As photographers, we sometime want to produce images that are different from the norm, an image that "non-photographers" simply wouldn't be able to produce. Impressionistic photography is a great way to do just that and here are some great tips on how to do it.
Multiple exposures
Multiple exposures are perfect for for impressionistic photography. It's the one element I miss about film photography as there are so few digital SLRs that allow the photographer to do this in camera. It is however possible to produce similar results using computer software. Create nine copies of the Background layer in Photoshop. Work with one layer at a time, starting with Layer 1 by hiding all other layers. Using the Move tool, nudge Layer 1 a little in any direction. Move onto Layer 2, nudging it a little in a different direction. Continue this process until you have moved each layer to a slightly different position. Go back to the original layer and Keep the blending mode set to Normal and reduce the Opacity to 50%. Continue through the remaining layers decreasing the Opacity to 33%, 25%, 20%, 17%, 14%, 13%, 11%, 10% and 9%. As there are so many layers, the image file will now be huge. Ensure you are happy with the position and opacity of the layers and flatten the image. You will then need to crop the edges to ensure a clean edge.

The Soft Effect
This is a great soft focus effect which is done entirely in Photoshop. It's actually very straightforward to do and the results look great. Simply open the image in Photoshop and duplicate the image layer. Blur the top layer using the Gaussian Blur tool (Filters > Blur > Gaussian Blur. Reduce the opacity of the top layer to around 25% and use a large soft eraser tool to erase any parts of the blurred layer where you feel you want detail to come through. You can also play around with Blending Modes as well, which changes the effect by adding contrast and added saturation. Try "Screen" or "Multiply" in the Blending Layers for some great effects.

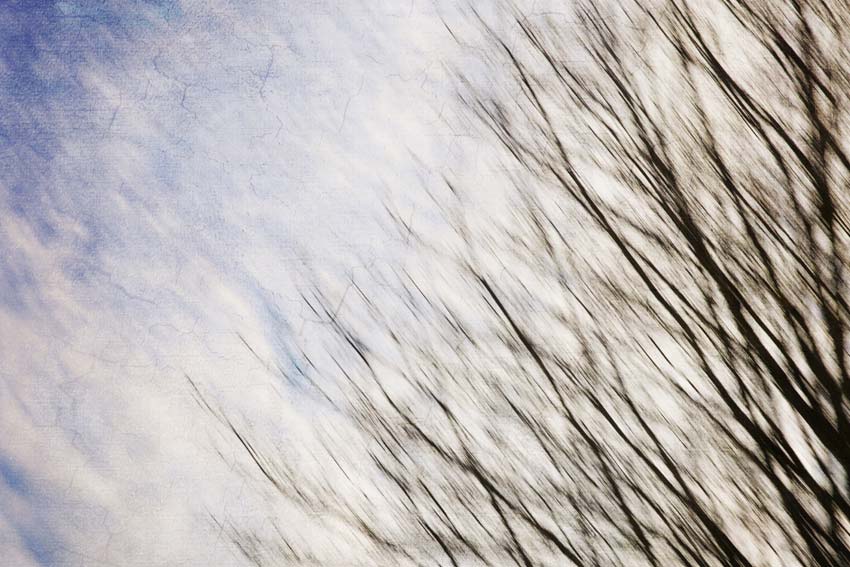
Panning
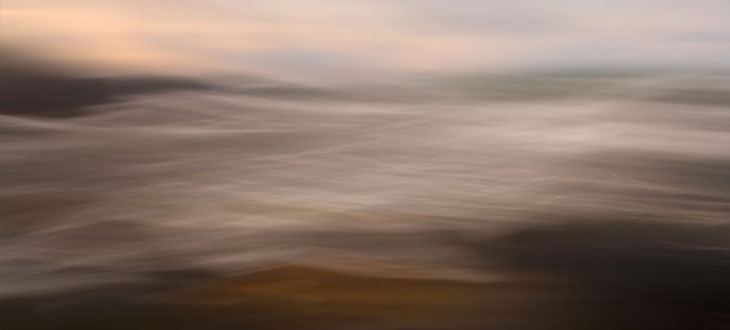
Panning is a technique best known for sports photography, when shooting a moving subject with a slow shutter speed. However, I've had some great results using this technique with landscapes and seascapes as well - and most people have no idea how I achieved the results! Set the camera to a slow shutter speed such as 2 seconds. and move the camera in a continuous direction whilst the shutter is open. If you're outside and you can't get long enough exposures, use a Neutral Density filter to cut out some of the light. I use a 10 stop ND filter which makes it very hard to see anything through the lens but the shutter speeds can be 20 seconds long during a sunny afternoon! Experimenting is the key to this and taking lots of pictures of the same thing. Sometimes it works and other times it doesn't but sadly there seems to be no reason why this is.

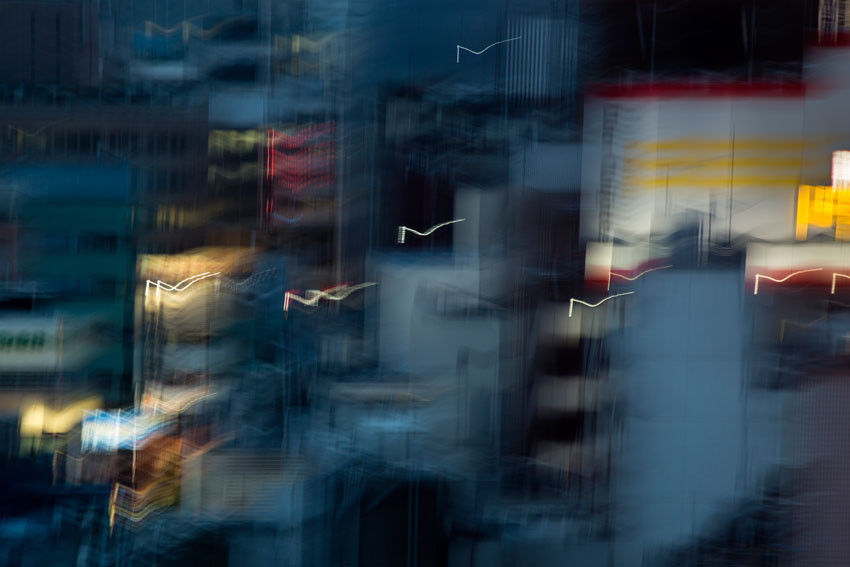
Shake it up
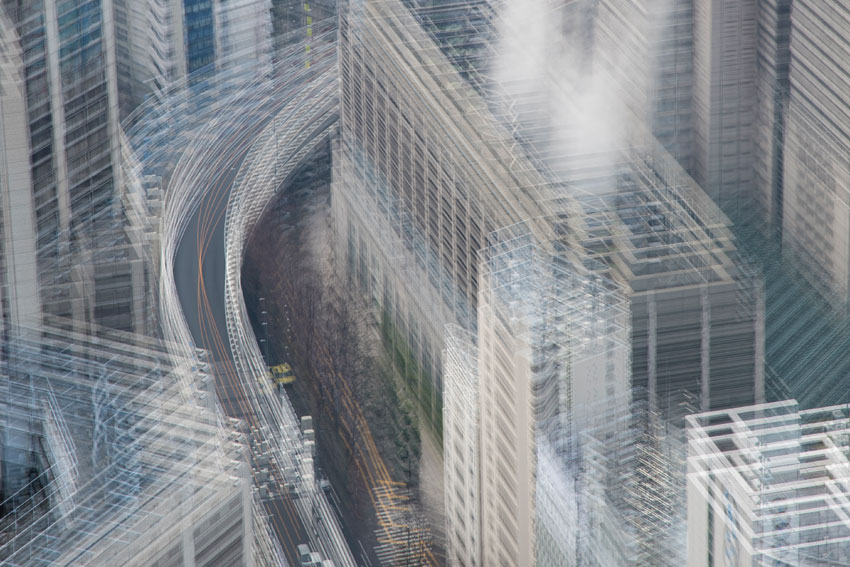
This is a similar technique to the one above. Instead of just using the panning motion, deliberately move your camera around in different directions during a long exposure. The best subjects for this kind of shot are colourful streetlights or shop fronts - areas that have a bright light source and lots of contrast. Make sure the rest of the scene is relatively dark to get the maximum effect. Set an exposure time of around five seconds and move your camera around while the shutter's open to effectively 'paint' abstract patterns with the light on the sensor. You can change the effect by varying the speed of your camera movements. Again, it's all about experimenting.
Pinhole photography
Add an impressionistic feel to your pictures by making your very own pinhole lens for your DSLR. Use a spare body cap and drill a small whole through in it. Next, grab some strong tinfoil and put a pin prick in the centre of it. The smaller the hole, the sharper the images will be but also the longer the shutter speeds will need to be. Attached the foil to the inside of the body cap and put it on the camera. Mount your camera to a tripod and start shooting. You'll need to use long exposures to allow enough light to reach the sensor. Start with an exposure time of around one second and go from there, trying out different settings until you achieve the desired effect.
Get frosty
Taking pictures through a piece of frosted glass is a great way of obscuring your subject, while keeping the impression of its presence. Place a sheet of frosted glass upright held in position by clamps or even books, something just to stop in moving and keep it upright. Place your subject, maybe a flower or pot of colourful pencils behind the glass and add some strong side lighting to pick up the detail. Shooting through the glass will create lovely effects and the further away the subject is to the glass, the more impressionistic the effect. There are lots of different types of patterned glass available and each one will give different effects.
Zoom burst
This method can get you some great shots from pretty much any subject and time of day. Look for plenty of colour and experiment with different shutter speeds for varying effects. Different focal lengths will also produce different images so mix it up a little and see what results you can get. For the best effect, keep the zoom action nice and smooth, a tripod may also be useful to keep the camera perfectly sharp. If you find your shutter speeds are too fast to allow enough zoom, use a Neutral Density filter or Polarising filter to cut some light out.

Reflections
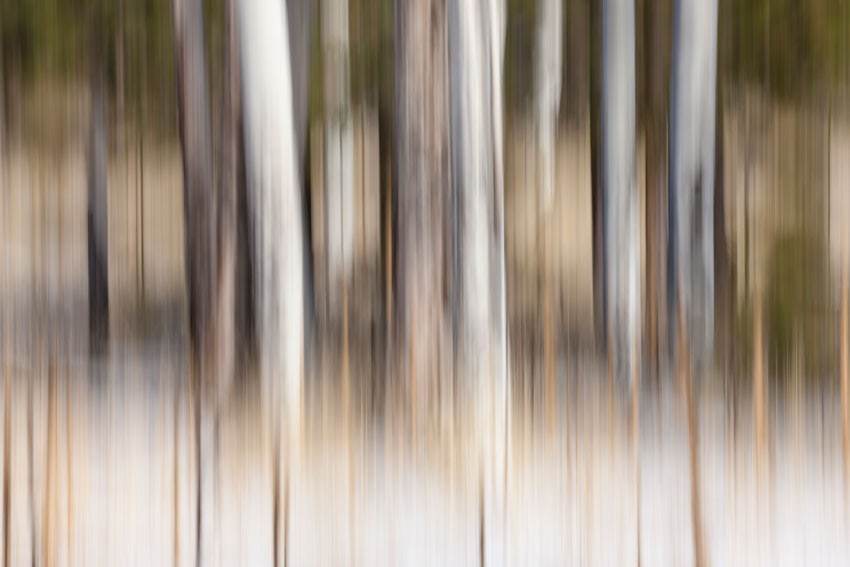
Photograph the reflections of your subject rippling on the water for an interesting abstract image. Colourful flowers, long grass or trees by the river bank provide the perfect subject for this. In low light the colours are warm adding to the effect. Try changing your focusing position, starting by focusing on the water and then on the subject. The results are quite different.

Paint with light
This is a great technique for creating surreal-looking images. Find a good location and mount your camera on a tripod. The area will have to be pretty dark before you begin as this will allow the torch to be the main light source.
Set your camera to record long exposures, about 30 seconds should be ok but experiment depending on the results. While the shutter's open, use a torch to effectively 'paint' the areas of your subject that you want to appear in the image. Be selective about what you "paint". You don't need to paint your whole subject; you could just draw round its outline or pick out key details to hint at what's there.
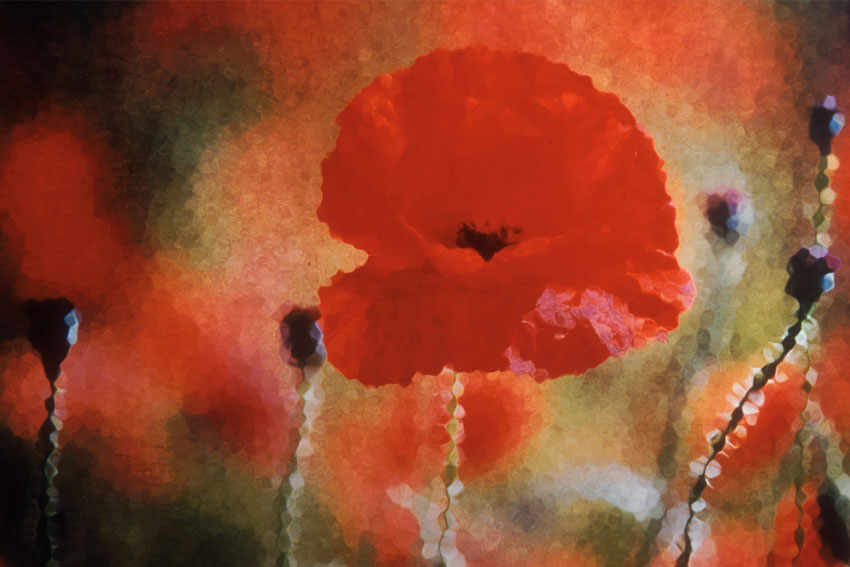
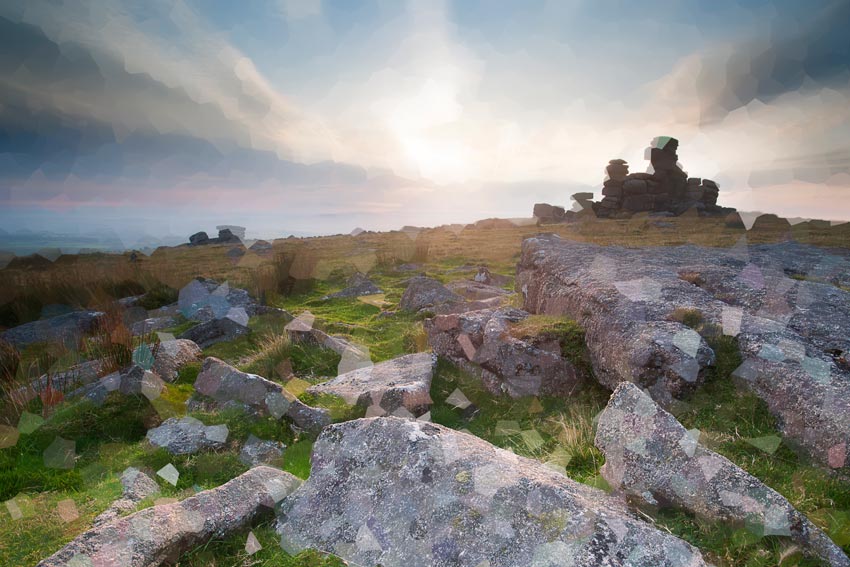
The Painted Photograph
Another great use for Photoshop is to emulate the brushstrokes used by impressionistic painters. There are many different filters available for doing this and the effect gets better and more developed with newer versions of the software Open your image and create a duplicate layer (Layer>Duplicate). Select Filter>Pixelate>Crystallize and adjust the settings in the dialog box to your taste. Click OK to return to your image and decrease the Opacity of the copy layer to around 60%. This will soften the effect. Experiment with blending modes of the duplicate layer. Leaving it set to Normal will have a bolder effect, or soften it further by setting it to Screen.
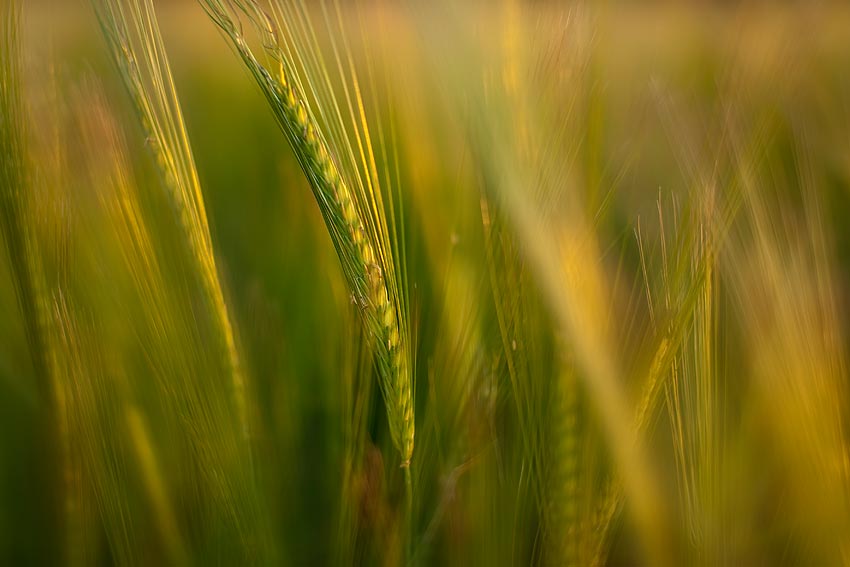
Think shallow
A macro lens will give very shallow depth of field by shooting with your aperture wide open. You'll end up with a very narrow band in which everything's in sharp focus and the rest of the shot will fall off into out-of-focus obscurity. Try photographing as many different objects you can find and get as close as you can. Look for shape and colour as well for an even more abstract effect.